
As the tax season approaches, businesses and freelancers alike find themselves immersed in the intricate world of tax compliance. One crucial aspect that often causes confusion is the issuance of 1099 forms. Whether you’re a business owner or a freelancer, understanding the ins and outs of sending 1099s is essential for smooth tax filing. In this comprehensive guide, we’ll delve into the basics, purpose, and the step-by-step process of sending 1099s.
Understanding the Basics: The 1099 form is a series of documents used to report various types of income, aside from regular salary or wages. This includes freelance earnings, rental income, and other types of miscellaneous income. The IRS requires businesses to issue 1099s to individuals or entities who receive $600 or more in non-employee compensation during the tax year.
Types of 1099 Forms: There are several types of 1099 forms, each serving a specific purpose. The most common forms include:
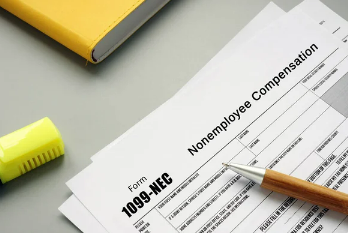
- 1099-NEC: Used to report non-employee compensation, such as freelance income.
- 1099-MISC: Covers miscellaneous income, including rent, prizes, awards, and other types of income.
- 1099-INT: Reports interest income earned on investments.
- 1099-DIV: Issued for dividend income received from investments.
- 1099-G: Used to report government payments, such as unemployment compensation or tax refunds.
Who Receives a 1099? Businesses must issue a 1099 to any individual or entity that meets the $600 threshold for the respective form. This includes independent contractors, freelancers, landlords, and others who receive income outside of a traditional employer-employee relationship.
Step-by-Step Process of Sending 1099s:
- Gather Information: Collect the necessary information from vendors, freelancers, or service providers, including their legal name, address, and taxpayer identification number (TIN).
- Verify TINs: It’s crucial to ensure the accuracy of the TINs provided by your vendors. The IRS provides an online TIN matching system to verify TINs before filing.

3. Determine the Appropriate Form: Identify the type of income you’re reporting and select the corresponding 1099 form. For non-employee compensation, use the 1099-NEC form.
4. Fill Out the Form: Complete the 1099 form with the relevant information, including the recipient’s details, amount paid, and any applicable deductions.
5. File with the IRS: Mail or electronically file Copy A of the 1099 form with the IRS by the specified deadline. Electronic filing is encouraged for efficiency.
6. Provide Copies to Recipients: Furnish Copy B of the 1099 form to the recipient by the deadline. This is usually January 31st.
7. Keep Records: Retain a copy of the filed 1099 forms and related documentation for at least four years.
Conclusion: Sending 1099s is a crucial aspect of tax compliance for businesses and freelancers. By understanding the basics and following a systematic process, you can ensure that you meet your obligations and contribute to a smoother tax season for everyone involved. Remember to stay informed about any changes in tax laws and deadlines and consult with a tax professional if you have specific questions or concerns.
Disclaimer: The information provided above is not meant to be legal or tax advise. You should consult your CPA and attorney to determine the best course of action for your situation.
Mitzi E. Sullivan, CPA is a cloud based professional services provider
specializing in cloud accounting.